My Secret Garden

Monday, October 22, 2012

Permananent Early Season changes

As I've once again reached the end of a gardening season I'm very excited to share my improvements to my garden this year!

So I've figured out my blog cannot be kept up during the growing season.  I also get a little down in the Fall & Winter because I can't garden. So I can happily live through the pictures I take in the Spring and Summer and blog in the off-season.

First things first, my husband built a white picket fence around my garden!
Flashback to 2011:

The Garden in April with the picket fence


And for Mother's Day he built me a an Arbor
I am now officially limited to the space inside the picket fence.....


or am I????

I hope you enjoy watching my garden grow throughout the Winter.


Wednesday, March 28, 2012

Spring Forward

I've been really busy outside lately, since we got a Spring Teaser.  But I've also been starting some seeds and doing some general Spring Cleaning in the Garden.   I'm hoping that this Friday we will till the garden and then I can get some stuff in the ground....

Here's my "still a work in progress 2012 Garden Plan.  The Red lines are brick pathways.

And now for an "Almost Wordless" Wednesday....

One very tiny Rosemary plant!

Tall one Sweet Pea Short ones -- Basil.

My Artichoke

Zinnias!

I saved these paperwhites from the Garden store, they were all curled over, they are slowly starting to stand up.

Teeny Strawberry Sprouts

Green Onions

Top: Borage Bottom: Dill


Friday, March 16, 2012

When and how do I move them?

Alternate title: Transplanting Without Tears

Before I really got into gardening, I believed you planted a seed in the ground and voila a few days later you had a plant that some time after that produced food or flowers. Now I've found that my plants are moved more often than my German Shepherd Dog we affectionately refer to as the Lump.

I have learned so much about transplanting.  When to transplant, how to transplant, where to transplant, and even with whom to transplant (I'm just kidding on that last one). So your seeds have become little teeny green plants. You are wondering "oh no! Now what?" Now you move them.

Transplanting is really easy. I think it's easier than germinating the seeds because with the transplants if something goes wrong you can see it right away which eliminates a lot of guesswork.

So what is a True Leaf?
The time to transplant is when you see 2  true leaves.  When a seed germinates it creates little leaves, called "seed leaves" seed leaves often look nothing like the true leaves.  Seed leaves are almost always in pairs and are very nondescript seed leaves of many different families of plants look alike. Seed leaves are the first leaves to soak up the sunlight. They allow for the plant to create the true leaves which are characteristic of the plants.


Seed leaves left to right Alyssum, Zinnia and Lettuce.

A true leaf comes after the seed leaves.  True leaves look like miniature plants.  While true leaves in the same families look the same, true leaves in different families don't.

Notice how the right two look alike, they are both brassica, cauliflower and broccoli the left one looks different it is lettuce.


When its time to transplant your seedlings, you will see the true leaves. Ideally you want two true leaves and to wait as long as possible to move your plants.  The longer you leave a seedling in it's original spot, the stronger your plant will be.  A stronger plant is more likely to survive transplanting.

Okay My plant is ready, Now How do I do this? 

Items you will need:
1- Small trowel
If moving to larger containers:
Enough Larger Containers for the seedlings you want to transplant
Potting Soil to fill the Containers

If moving to the garden:
Beds prepared with organic material to feed the plants 
Pre-dug small holes where you plan to plant.
I generally add Miracle Gro Organic Soil and compost when I first plant.

So your seedling has 2 true leaves, it's a nice size sturdy little guy and now you're ready to move it.


I've found the best tool for transplanting is a little trowel from a gardening set I bought for my daughter. The goal is to get a small shovel that will fit in the row and only affect the plant you are set to move.

After you loosen your seedling from the flat pick up the the seedling by the true leaves and place into a larger container with potting soil or directly into your prepared garden bed.

I cut an "X" on the bottom of these cups to facilitate drainage.

Now your transplants are happy in their new bigger digs! Don't forget to label the new containers. I generally label the containers with original seed planting date, transplanting date and plant name. I learned this part the hard way when last year until mid-June I was playing cauliflower, broccoli, cabbage roulette!
I will cut off the bottom half of the cups and plant the cup and all in my garden.  This will protect the plants from insects.

 What can go wrong?

Most people think the best way to move a seedling is to handle it by the stem.  This is ABSOLUTELY WRONG!!! NEVER EVER EVER Handle a seedling by the stem. Handling a seedling by the stem can injure the stem, injuring the stem can make the stem more susceptible to damping off.

Damping off is a group of diseases that attack plant stems and cause the seedling to collapse and the plant to die. The stem withers and changes colors. The Ontario Crop IPM has a great picture of damping off in pepper plants.
Image located http://www.omafra.gov.on.ca/IPM/english/peppers/diseases-and-disorders/damping-off.html

Monday, March 12, 2012

Seed Starting using artificial light

Before I got really addicted and my husband bought me a greenhouse for Christmas, I started seeds in my basement. My basement stays about 65-ish degrees year round, which is a bit chilly for me and for seed germination on certain plants, like peppers and eggplant. The unfinished part of my basement is also dark. Again not great for plant growing.

So I have a few conditions I need to fix:

Adequate Lighting
Warmth for seed germination

I began with 2 collapsible tables.  I used one for my seed trays and the other for supplies and staging. I purchased enough seed trays to cover the top of the table (3-72 cell trays).  And one heat germination mat.

Then I purchased 3 fluorescent shop lights which were about $8 each.  I also bought the light bulbs (just standard cool white florescent, nothing special) some chain, screw in hooks and 2 S-hooks for each light. Using the exposed floor joists I screwed the hooks into the ceiling attached the chains to the light using the s-hooks and hung my light on chains that put them 6-8 inches from the tops of the plants.  Using chains and hooks is important so you can move the lights up as your plants grow.

Tomatoes in the foreground, peppers in the back right, squash back left

At the far back center of this picture you get a very good illustration of what happens when the artificial light is too far away. That's what's called a "leggy" plant.

The whole setup up: these trays produced the picture below


My initial investment was about $100 for the trays, seed starters, seeds, lights, chains and then another $25 for the heat mat which isn't necessary if your room temp is 70 degrees or higher.

Sunday, March 11, 2012

Attracting Beneficials

As I've mentioned, I try to adhere to sustainable gardening practices.  In doing so I attempt to attract birds and beneficial insects to my garden.  This allows me to minimize my use of even organic insecticides.

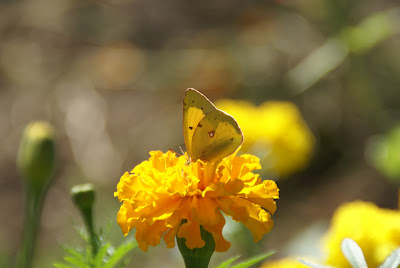
My favorite pollinators are Butterflies.  So I plant flowers to attract them.  I've found they really like Zinnias, which is good because I do too!
This year  I'm hoping to create a butterfly and hummingbird garden. Very similar to this one I found on Kids Gardening. I will add some marigolds, zinnias and cosmos to this, using a butterfly seed mix.
e

I also like to attract bees.


 And finally just by luck I got a praying mantis last year!


I attract birds quite easily by providing them food. Year round I stock my bird feeders and keep them full, during the growing season I provide them with a fresh supply of water and often unintentionally seeds that I have sown. Last year the crows kept stealing my bean and corn seeds before they could germinate.  I finally solved that problem by making a tent from a short tomato cage and a piece of burlap.  I do love the birds though, so we will make things work.  I watched a pair of Eastern Goldfinches pretty much all summer last year, and a pair of brown doves and a few blue jays. We also had some very interesting birds we were not able to identify nor catch on camera.


And my final regular visitor is not very beneficial to the garden, but she always elevates the mood of the gardener...
Sophie a Cavalier King Charles Spaniel


Amending your soil..

You will want to amend your soil early especially if you are going organic. Organic soil amendments are better for the ground and your family, but they also take time to work their magic. I prefer to use sustainable gardening, this includes rotating my crops, companion planting, and no chemicals.  I garden for a number of reasons, first and foremost, I truly enjoy it. I honestly never feel closer to God than when my hands are deep in the earth, except maybe when with awe and wonder I watch a little tiny seed become a massive plant that produces food. I also garden because I want to eat healthy and I want my family to eat healthy. Sometimes no chemicals is exhilarating, like watching this jungle form where there was only dirt before. And sometimes it's heartbreaking, like watching late blight take my entire tomato crop last year.

I am in New Jersey, the so-called Garden State, however that does not make my soil perfect.  I learned last year what I needed to do to make my garden grow.

The first step is figuring out what kind of soil you have.

Step 1: Wait for rain.  About 2-5 hours after a good hard rain, go out to your site.  If there is still standing water, you can safely assume you will need to add sand, compost and probably some peat or peat alternative like coco peat (as there is some question about the sustainability of peat and I do try to garden as sustainably as possible). All of those will help your drainage, which you have very little. These coco peat bricks will amend .33 cuft of topsoil.


Step 2: If there are no puddles pull out your shovel and loosen up a nice area of soil.  Once loosed gather a handful of dirt and make a dirt ball.

(Soil Descriptions were taken from:  Cornel University Cooperative Extension Agrinomy Fact Sheet Series Fact Sheet 29: Soil Texture. http://nmsp.cals.cornell.edu/guidelines/factsheets.html )

A clayey soil forms large, hard clods and cracks form on the surface. Clayey soils feel sticky and are bendable when moist. A ribbon can be formed when moist by pinching soil between fingers and thumb. A longer ribbon formed before it breaks indicates a higher amount of clay..

To amend Clay type soil, you will need to add organic materials like compost and humus.

A silty soil breaks apart easily and has a floury appearance when dry. When moist, silty soils have a slick feel and form no ribbon when pinched between fingers and thumb.

To amend silty soil you will need to add organic material but also sand or top soil. Silt is much too compact to allow for proper drainage.

A sandy soil feels gritty and falls apart easily if formed into a ball when moist.

Sandy soil needs organic material also but I add to it a bit of topsoil again.

The type of soil you are going for is  loamy soil feels somewhat gritty, yet is  easy to work; it has relatively even amounts of sand, silt, and clay; if formed into a ball when moist, it holds its shape, yet still breaks apart easily when squeezed.

I have found that adding Miracle Gro Organic Garden Soil, Organic Top Soil and Compost or Humus in a 30-50-20 mix makes for a nice solid soil. I also tend to add sand, regular sandbox sand for my plants that call for sandier soil like okra and cucumbers. I do all this amending on my hands and knees. It's hard work but so amazing when you see what your hardwork produces.

I also add mulch to my garden all season long! I get a truckload delivered to my back yard just outside my garden in the late Spring, and just add it as needed throughout the summer.  I use a mulch that decomposes into humus and provides a nice fertilizer throughout the year.

I also use companion planting to reduce weeding and watering.  One great example of this is planting squash and gourds in my corn this allows the squash to spread out and cover the ground which keeps in water and keeps out weeds!
Corn just coming up, pumpkins beginning to spread

Same view a few weeks later

The gourds are beginning to climb the corn stalks, I kept pulling them off.

Tuesday, March 6, 2012

The Beginning


In the case of gardening, most people start with seeds. You can start with transplants, (little plant you buy at the store usually in a 4 or 6-pack) but those get transplanted the same way our seeds will a little later, so we will get there. I prefer seeds for a number of reasons:

1- Cost.  It's much cheaper to buy seeds than plants.
2- Variety. Most home improvement stores have a wide selection of seeds of virtually any vegetable  you can dream up.  Seed packets require no maintenance and very little space. Plants, even seedlings, require daily watering, sun exposure and space for pots.
3- Satisfaction. There is something about seeing a seed turn into a seedling which grows into a plant that produces food for your family.


So for starting seeds...

You will need:

Seed starter.  I prefer organic seed starter.  I usually buy it when it goes on sale at the end of the season (August-November) and store it for the following year.
Seed starter containers.  There are many choices for seed starting containers.  You can purchase special containers or use/reuse common household items.
 I've used Styrofoam or cardboard egg cartons, yogurt cups, milk gallons, red plastic cups, peat pots and seed greenhouse trays. I like to save money so I prefer the cheapest. Cover any vessel that can hold seed starter and water with plastic wrap and voila instant Greenhouse.  Alternately you can place smaller cups and such inside gallon zip bags.


One really cheap "greenhouse" to make is a milk jug greenhouse.

Take a clear plastic milk jug, a roll of packing tape and a box cutter.  Cut around the milk jug just under the handle. tape the pieces back together on one side inside and out to make a hinge.  Use the box cutter to poke holes in the bottom. Fill the bottom half with with seed starter. Plant your seeds.

For the store bought version you can buy the trays with plastic dome lids like the ones pictured below. There are trays included which are usually 1x1inch squares or seed starter pods that expand to 5 inch tall 1x1 round plugs with paper on the outside. 
I have found that the smaller soil area in the inset trays or dries out more quickly so I remove the inner trays and fill the bottom tray with seed starter. Then I plant my seeds in little rows in the tray.  I use small craft sticks to label the plant and the date planted.

Depending on the seed type, you will soon have little seedlings. :)

Thanks,
E

Rules, Tips, Tricks Post 1

Rule #1
ONLY buy seeds or plants for vegetables and fruit you and your family will eat! This seemed like a no-brainer to me when I first read it, but now that I've caught the seed shopping bug, I really have to remind myself from time to time. When those seed catalogs start coming in with all those full color pictures of food you never even knew existed, let alone something you could grow.... Let's just say it can make your head spin and the next thing you know you have some kind of vegetable or fruit in your shopping cart and you know there's no way anyone in your family will touch it not even you, and then you realize even if a packet of seeds is only $2 that's $2 you could spend on something you will eat and besides your garden space is not endless.... You know 'cause I've heard this can happen to people...

which brings us to

Rule #2

Know how big your garden is and how much space that teeny tiny little seed will take up later on. when you're holding those tiny little seeds or the slightly bigger but still small by comparison transplants it's hard to imagine the 4 foot square plant it's going to be.  Planting too close together not only robs your plants of the nutrients they need to grow, but also can cause disease to wipe out your entire garden. Plants need room to grow and breathe. I use a site called Garden Planner it's perfect especially if you have no idea how far apart to plant your plants. Here's a picture of my garden from last year.

My original plan
My end result!


Rule #3 
Be aware of how much time you have to dedicate to your garden. Obviously, the larger the garden the more work involved. But it seems the work grows exponentially as the size grows. At the height of my gardening last summer, I was weeding 2-3 hours per day.


For heirloom seeds, I prefer Baker Creek Seed Co. they specialize in heirloom varieties of vegetables and flowers. Heirloom seeds are open pollinated which means you can save them and plant seeds you harvest from the vegetables and flowers you grow. Open pollinated seeds are also generally cheaper.

If I'm looking for all types, organic, hybrids and heirlooms or fruit plants in the same order I prefer Burpee Seeds. Burpee are also sold in Lowe's and Home Depot.

For organic seeds I prefer, Seeds of Change which I was pleased to see offered in limited selection at my local Lowe's store. Seeds of Change Seeds are more expensive than either of the other two, but I've tried 3 types of corn and scarlet runner beans from them.  I've had 100% germination and beautiful prolithic plants.

Whenever I can I try to patronize my local Feed and Seed store. You should be able to Google "Feed and Seed" if buying locally is something you value.  Besides supporting your community, the knowledge at the three stores I patronize is invaluable. The store closest to my house has a guy who specializes in organic vegetable gardening and especially pest and disease control in the organic garden. He has been an invaluable resource.

I'm always looking for ways to re use in the garden.  This may be my favorite!

Milk jug greenhouse